This post teaches you all you need to know about connecting DStv Explora to internet and new emerging features. Do you own a DStv Explora decoder or intend buying one? This article also shows how to connect DStv Explora to internet using WiFi. This article also explains all the steps and materials for the internet connection of DStv Explora decoder. Certainly, there are many benefits of connecting this decoder to internet. So many services, which are only available upon connecting to the internet will thrill you as I roll them out in this article. Surely, you will thank me later. However, there are specific services available when you link Explora online.
Indeed, it is true that you can now connect DStv Explora to internet. MultiChoice DStv has activated the features and functions on the Explora decoder, enabling link to the internet for tailored services. As you learn how to connect DStv Explora to internet in this article, you will also see the type of services you can access. Furthermore, the connection procedures are very simple such that anyone could handle it.
There have been confusion about available services since MultiChoice launched internet connection via DStv Explora. Furthermore, Explora users wonder if they would have unlimited access to the internet to browse the social media and surf the web. However, it would amaze you to know that such connection is not the usual type of internet access you enjoy on regular devices.
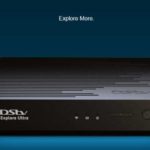
However, DStv recently unveiled a new broadband DStv uncapped fiber internet connectivity. This latest technology connects users to the internet using the Explora as modems in a seamless manner. Interestingly, a newer version of the Explora with a built-in WiFi launched recently too. This new Explora with all enhanced features including a $K HDR screen display and many other wonderful features is called the Explora Ultra Decoder.
The essence of introducing internet connectivity features on the Explora is to optimize the performance of the new DStv most innovative Decoder. The internet increasingly facilitates many more satellite pay-TV services, thereby requiring connecting media to access them. Connecting the Explora decoder to the internet may give you full access to surfing the web in future. However, there are currently only few streamlined access tailored to some services embedded in the Explora. These services available on Explora internet are enumerated below;
Available Services on Explora Connection
Before I list the services obtainable when you link DStv Explora to the internet, I previously wrote on Step-by-Step Guild to Connect DStv Explora to the Internet. This article will detail you on the equipment you need and the processes involved in linking Explora to internet.
Let us now assume that you have learnt and connected the decoder to the internet. DStv Explora users would be able to enjoy many more unlocked options on the Catch-Up Plus. Furthermore, users shall also enjoy full access to DStv ShowMax. If the user has a Surfline device, linking the decoder to internet via DStv WiFi enables unlimited access to seamless video streaming. Additionally, the user enjoys impressive DStv Data Bundle. When streaming video, your device consumes less direct data. More importantly, internet access becomes accessible anytime and anywhere due to the partnership MultiChoice DStv has with Surfline.
However, many more services keep unfolding as more internet-based services are activated. Interestingly, there are still many features and functions on the DStv Explora that are still inactive. You could notice that some buttons and ports on the decoder do not seem to work right? Do not worry, they will come alive with time. You may have seen features such as Uncapped Internet connectivity, built-in WiFi, streaming Apps on Explora Ultra etc, come alive. What about a 4K HDR and Dolby ATMOS features possibility in newer decoder models?
Step-by-Step Guild to Connect DStv Explora To Internet
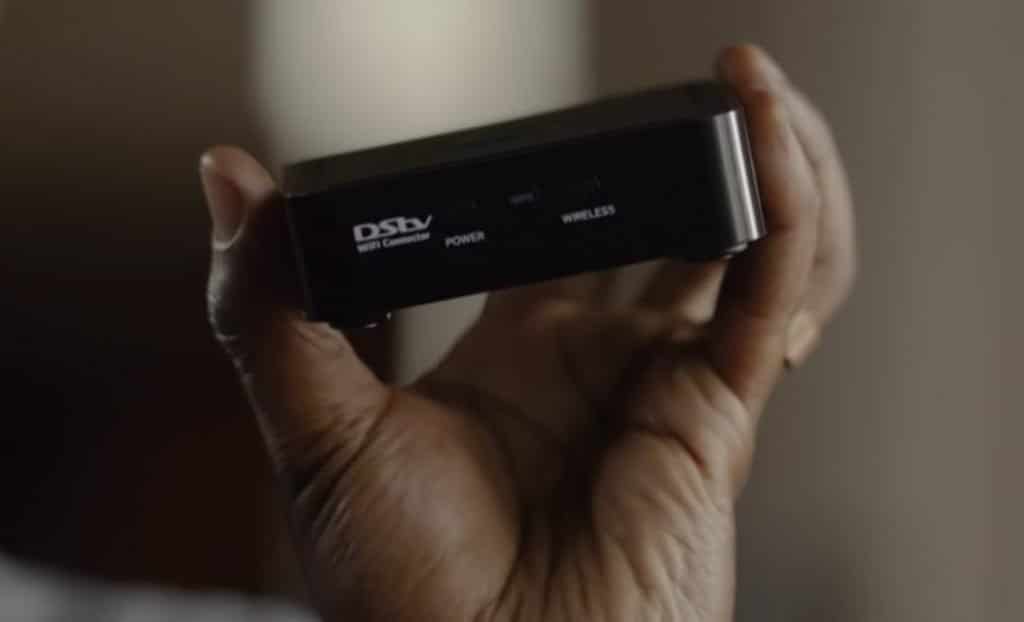
When you consider linking your Explora to internet using WiFi, ensure there is a broadband or unlimited internet service in your home. This form of internet is not your usual mobile internet because it is capped. I am talking about uncapped fibre connectivity such as dedicated broadband wireless routers. However, using mobile internet as your ISP source for Explora internet connection would deplete your data in few minutes. Certainly, you need a DStv WiFi connector to help you have a wireless connection between your Explora and router. Now here is the step-by-step guild to connect DStv Explora decoder to internet using wireless WiFi.
Let us consider two options. Firstly, check if your router has a WPS button. The Wi-Fi Protected Setup™ or WPS configures one device at a time. The button is found either on the front or back panel of your router. However, the function of the WPS is to connect WPS-supported devices, such as wireless printers, to your router using wireless. Otherwise, you will need to set up your laptop close to your router before starting if your router does not have any WPS button. So let’s connect your Explora to internet using WiFi.
Follow these Procedures to Connect
Connect the supplied power cable to the laptop USB port and the other end into the power input on the back of the connector.
Link the Ethernet cable by inserting one end to the Ethernet port on your laptop and the other side into the Ethernet port at the back of the connector.
Now open any web browser such as Chrome on your laptop and type in http://dstvwifi.local/ in the address bar
From the list of options you will see, select your router as it would appear as one of the options. Enter your WiFi password (if any) and then click on CONNECT.
Once connected, you can now disconnect your laptop.
Take the internet-connected Ethernet cable, connect one side into the green Ethernet port of the DStv Explora decoder. Then insert the other end into the connector’s Ethernet port.
Use the other cable to insert into either of the USB port of the Explorer and insert the other-side into the power input of the WiFi connector.
The power LED on the front of the WiFi connector turns WHITE as it powers ON. Then wait for two (2) minutes and watch it connect successfully to internet.
Next go the DStv Explora decoder, use the connectivity checker to confirm that you are connected to the internet.
How to Use the Connectivity Checker on DStv Explora
Press “HELP” on your DStv Explora remote
Select “TOOLS”
Scroll to “Connectivity checker” and press OK
Afterwards, switch on your connected services that requires internet to work. Normally, all services stay OFF by default. Therefore, manually turn ON any services that you wish to enable.
To do this Press the blue DStv button on your remote
Select “Settings”
scroll to “User preferences” and select it
Select “Connected services “
At this point, choose which services you want to turn ON or OFF. Such services are the DStv Catch up plus, Video-On-Demand or remote recordings etc.
Congratulations! You have successfully connected your Explora decoder to internet using WiFi connectivity.
NOTE
DStv Catch Up Plus is exclusive to Premium subscribers.
All connected services attract data charges from your internet network provider.
For efficient internet surfing and seamless streaming and downloads, a minimum of 2 Mbps dedicated internet is required. Using a high speed internet prevents buffering and ensures a pleasurable internet experience.
Did you find this article helpful? please add your thoughts by commenting in the space below. Also remember to share this post via social buttons below. Follow us on Facebook to join our conversations and engage with other fans.
AMADI EMMANUEL IS THE FOUNDER, AUTHOR OF DTMEDIA.tech WEBSITE, WHICH REPRESENTS THE OFFICIAL ONLINE RESOURCE PLATFORM FOR DTMEDIA TECHNOLOGIES.
FACEBOOK: @euamadi
WHATSAPP: +2348036914229
PHONE CALL: +2348036914229
YOUTUBE: https://www.youtube.com/@InnovationsSuggest