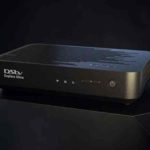
Finally MultiChoice DStv, the leading company in Nigeria and Africa that provides digital satellite pay-tv entertainment has enabled internet connectivity on their latest Higher Definition PVR decoder known as the Explora.
This means that in the comfort of your home, you can now link to the internet to access certain services. But what are these services? How do I connect my Explora to the internet? Does it attract extra charges? I shall answer these questions and more as you read down.
This means that in the comfort of your home, you can now link to the internet to access certain services. But what are these services? How do I connect my Explora to the internet? Does it attract extra charges? I shall answer these questions and more as you read down.
The Explora internet features can be used to access two major services – the DStv Catch Up Plus and Remote Recordings.

There are two ways you can connect your DStv Explora decoder to the internet. They are listed below with full connection guild provided as follows;
Using the Ethernet: an Ethernet cable is employed to connect the Explora via its Ethernet port to the existing internet router in your home. However, if the router is located in another room from where the Explora is, then you need to run a cable through until both get linked.
The step by step procedure is;
-
Insert a standard Ethernet cable directly into the green Ethernet port on the back of your DStv Explora and then insert the other end into an available Ethernet port on your router.
-
Confirm that the DStv Explora is connected to the internet using the Connectivity Checker on your DStv Explora. Press HELP on the remote control, select “TOOLS”, select “CONNECTIVITY CHECKER” and press OK.
-
The default setting for all Connected Services on your DStv Explora is set to “Off”. You can manually select which of the services you want enabled. Press the BLUE DSTV button, select SETTINGS, select USER PREFERENCES, select CONNECTED SERVICES, you can now set each of the connected services to ON or OFF individually, then press BACK to save your settings.
Using the DStv Wifi Connector: let’s say you wish to avoid running any wires in your home, or maybe the decoder is not located in the same room as the Explora, you can alternatively connect wirelessly by making use of the DStv Wifi Connector.
If your router has a WPS button, then you need to adopt an automatic setup.
-
Using the supplied power cable, insert one end into the USB port on the back of the DStv Explora and the other end into the power input on the back of the DStv WiFi Connector.
-
The Power LED on the front of the DStv WiFi Connector should glow solid amber and then change to solid white (confirming it has power).
-
Press the WPS button on your router, followed by the WPS button on the DStv WiFi Connector. Wait two minutes.
-
The Wireless LED on the front of the DStv WiFi Connector will flash white (while the WPS is in progress) and change to solid white (once an internet connection has been established).
However, if your router does not have any WPS button,
-
Place your computer close to your router. Turn WiFi off on your computer. Using the supplied power cable, connect one end into the USB port on your computer and the other end into the power input on the back of the DStv WiFi Connector. Using the supplied Ethernet cable, insert the one end into the Ethernet port on your computer. Now insert the other end into the Ethernet port on the back of the DStv WiFi Connector.
-
Open the web browser on your computer and type http://dstvwifi.local/ into the address bar.
-
Select your router from the list, enter your wireless password and click on “Connect”.
-
Disconnect the DStv WiFi Connector from your computer.
-
Using the supplied Ethernet cable, insert the one end into the green Ethernet port on the back of the DStv Explora. Now insert the other end into the Ethernet port on the back of the DStv WiFi Connector. Using the supplied power cable, connect one end into the USB port on the back of the DStv Explora and the other end into the power input on the back of the DStv WiFi Connector. The Power LED on the front of the DStv WiFi connector should light up (solid amber) and then change to solid white, confirming the DStv WiFi Connector has power.
-
Wait two minutes. The Wireless LED on the front of the DStv WiFi Connector should light up (solid white) once an internet connection has been established.
-
You can now check the connectivity on your DStv Explora.
Press HELP on the remote. Select “Tools”. Select “Connectivity Checker” and press OK.
- The default setting for all Connected Services on your DStv Explora is set to “Off”. You can manually select which of the services you want enabled.
Step 8
Press the blue DStv button. Select “Settings”. Select “User Preferences”. Select “Connected Services”. You can then set each of the Connected Services “On” or “Off” individually. Press BACK to save your setting.
How to Troubleshoot your Explora Internet Connectivity
Just in case you have any of these issues while trying to setup your Explora for the internet;
-
“WLAN” Network could not be found – your DStv Wifi Connector may be too far from the router or your router may be switched off. Bring the DStv Wifi connector closer to the router and ensure it is switched on.
-
“Wrong Password” – maybe you entered the wrong WLAN password. Reenter the correct password and try again.
-
If the wireless LED light on the front of the DStv Wifi connector is solid amber, the internet connection is weak. To correct this anomaly, move the Wifi connector closer to the router and try again.
If you own a DStv Explora decoder, now is the time to really explore the magic of the DStv Explora decoder. Have you successfully learnt how you can now connect to the internet with your DStv Explora decoder? If you found this publication useful, ensure you extend same knowledge to friends and family by sharing on the social media – Facebook, twitter and so on.
Also, to stay updated with the latest information on the world of DStv and satellite TV technology, subscribe to our free mailing list by simply submitting your email.
Also, to stay updated with the latest information on the world of DStv and satellite TV technology, subscribe to our free mailing list by simply submitting your email.
Terms as stipulated by DStv: Data charges apply when using Connected Services on the DStv Explora and we recommend an uncapped ADSL account, with a minimum 2Mbps download speed when using this feature. Downloading video consumes large amounts of data so please be aware of your data package limits and costs. DStv will not be held responsible for data usage. DStv Catch Up Plus exclusive to DStv Premium customers. Terms & Conditions apply. Visit dstv.com/GetConnected for more information.